RTCM Firmware upgrading
The VOTER/RTCM tries to update it's firmware every time it boots as part of the bootloader process. The bootloader has it's own IP address which is set by menu 14 of the IP parameters (i) menu.
IP Parameters Menu

Select the following values to View/Modify:

1  - (Static) IP Address (192.168.1.124)
2  - (Static) Netmask (255.255.255.0)
3  - (Static) Gateway (192.168.1.254)
4  - (Static) Primary DNS Server (8.8.8.8)
5  - (Static) Secondary DNS Server (0.0.0.0)
6  - DHCP Enable (0)
7  - Telnet Port (23)
8  - Telnet Username (admin)
9  - Telnet Password (radios)
10 - DynDNS Enable (0)
11 - DynDNS Username (wb6nil)
12 - DynDNS Password (radios42)
13 - DynDNS Host (voter-test.dyndns.org)
14 - BootLoader IP Address (192.168.1.11) (OK)
15 - Ethernet Duplex (0=Half, 1=Full) (1)
99 - Save Values to EEPROM
x  - Exit IP Parameters Menu (back to main menu)
q  - Disconnect Remote Console Session, r - reboot system
The default bootloader IP address is 192.168.1.11. If that address fits in your network you can leave it there for all the RTCMs on your LAN as it is active only during the bootloader process.
If you are updating an RTCM which is behind a firewall you will need to port forward 16388/UDP to the bootloader IP address. If you leave all your bootloaders on the same IP address then you won't have to change the forwarding to update different RTCMs.
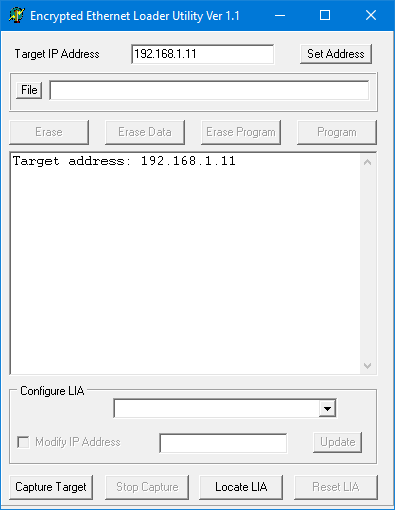
The VOTER/RTCM firmware is updated with a Windows program EBLEX C3 Programmer. Download from here. Put both the exe and the ini file in a folder.
Download the firmware here. If you are upgrading an RTCM be sure to use a .cry file that contains smt in the filename. If you are upgrading a through-hole VOTER, do not use the smt files. Save the .cry file in the folder with the .exe and .ini files.
Run the EBLEX Programmer:

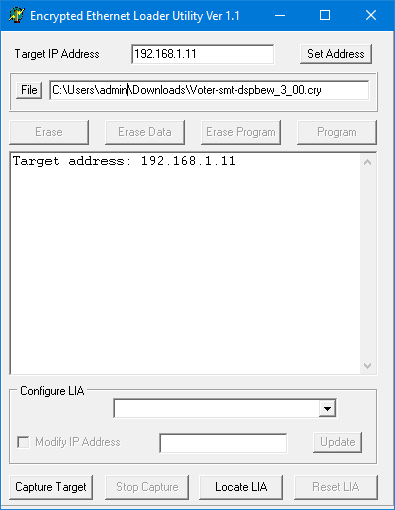
- Fill in the target bootloader IP address (or the public IP, if your RTCM is behind a firewall) of the device.
- Click File and load the .cry file you are going to program.

- Click the Capture Target button.
- Reboot the VOTER/RTCM with TELNET (r option), power cycle, or use the reset button. In a moment you should see text come up on the programmer that it captured the target.
- Click the Program button.
- In a few minutes you will see some more messages including a program complete message.
- Click the Reset LIA button. The VOTER/RTCM will restart with the new firmware.
TELNET into your VOTER/RTCM and verify the new version is loaded with menu 98:
S/W Version: 3.00 3/24/2021
System Uptime: 1992442.4 Secs
IP Address: 192.168.1.124
Netmask: 255.255.255.0
Gateway: 192.168.1.254
Primary DNS: 8.8.8.8
Secondary DNS: 0.0.0.0
DHCP: 0
VOTER Server IP: 192.168.1.100
VOTER Server UDP Port: 667
OUR UDP Port: 667
GPS Lock: 1
PPS BAD or Wrong Polarity: 0
Connected: 1
COR: 0
EXT CTCSS IN: 0
PTT: 0
RSSI: 0
Current Samples / Sec.: 8000
Current Peak Audio Level: 65528
Squelch Noise Gain Value: 45, Diode Cal. Value: 60, SQL Level 675, Hysteresis 10
Current Time: Sat  Jan 29, 2022  22:21:56.160
Last Ntwk Rx Pkt System time: 01/29/2022 22:20:33.540, diff: 82620 msec
Last Ntwk Rx Pkt Timestamp time: 01/29/2022 22:20:33.540, diff: 0 msec
Last Ntwk Rx Pkt index: 320, inbounds: 1

Press The Any Key (Enter) To Continue